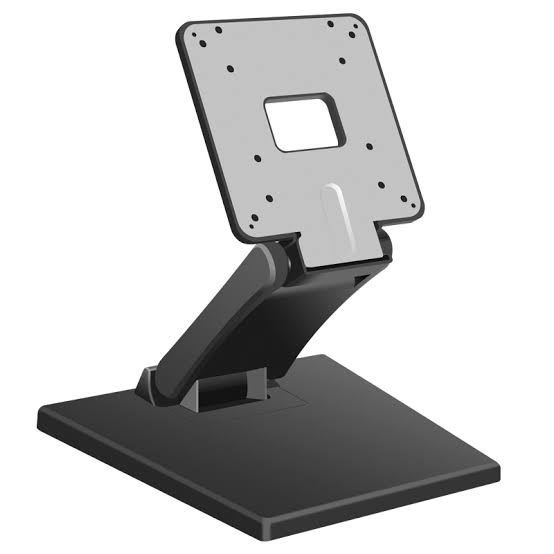
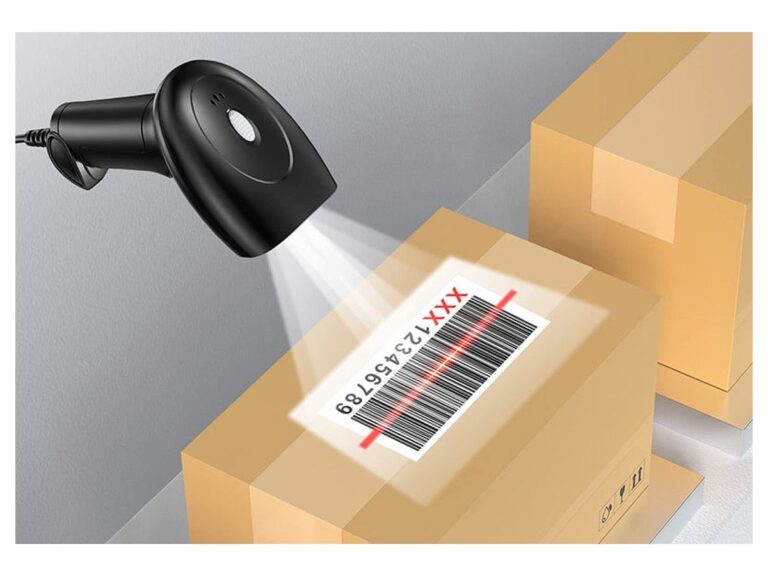
Learning how to use a cash register is the first real skill of any retail job, and it is easier than the machine looks. The buttons, the drawer, the receipt printer and the little display that faces the customer are all built around one simple loop: enter what the customer is buying, take the money, give the right change, and leave a record of what happened. Once you can run that loop without thinking, everything else a register does — discounts, returns, shift reports — is just a variation on it.
This guide is written for new cashiers and small shop owners who have never rung up a sale before. It walks through the parts of a register, the one-time setup chores a manager handles, the transaction itself, how to count change back without panicking, and how to close the till at the end of a shift. It also explains what changed when counters moved from traditional electronic registers to modern POS terminals — useful context if you are the one choosing the hardware. If you already know the operational side and just need to pick a machine, jump to our POS cashier machine buying guide.
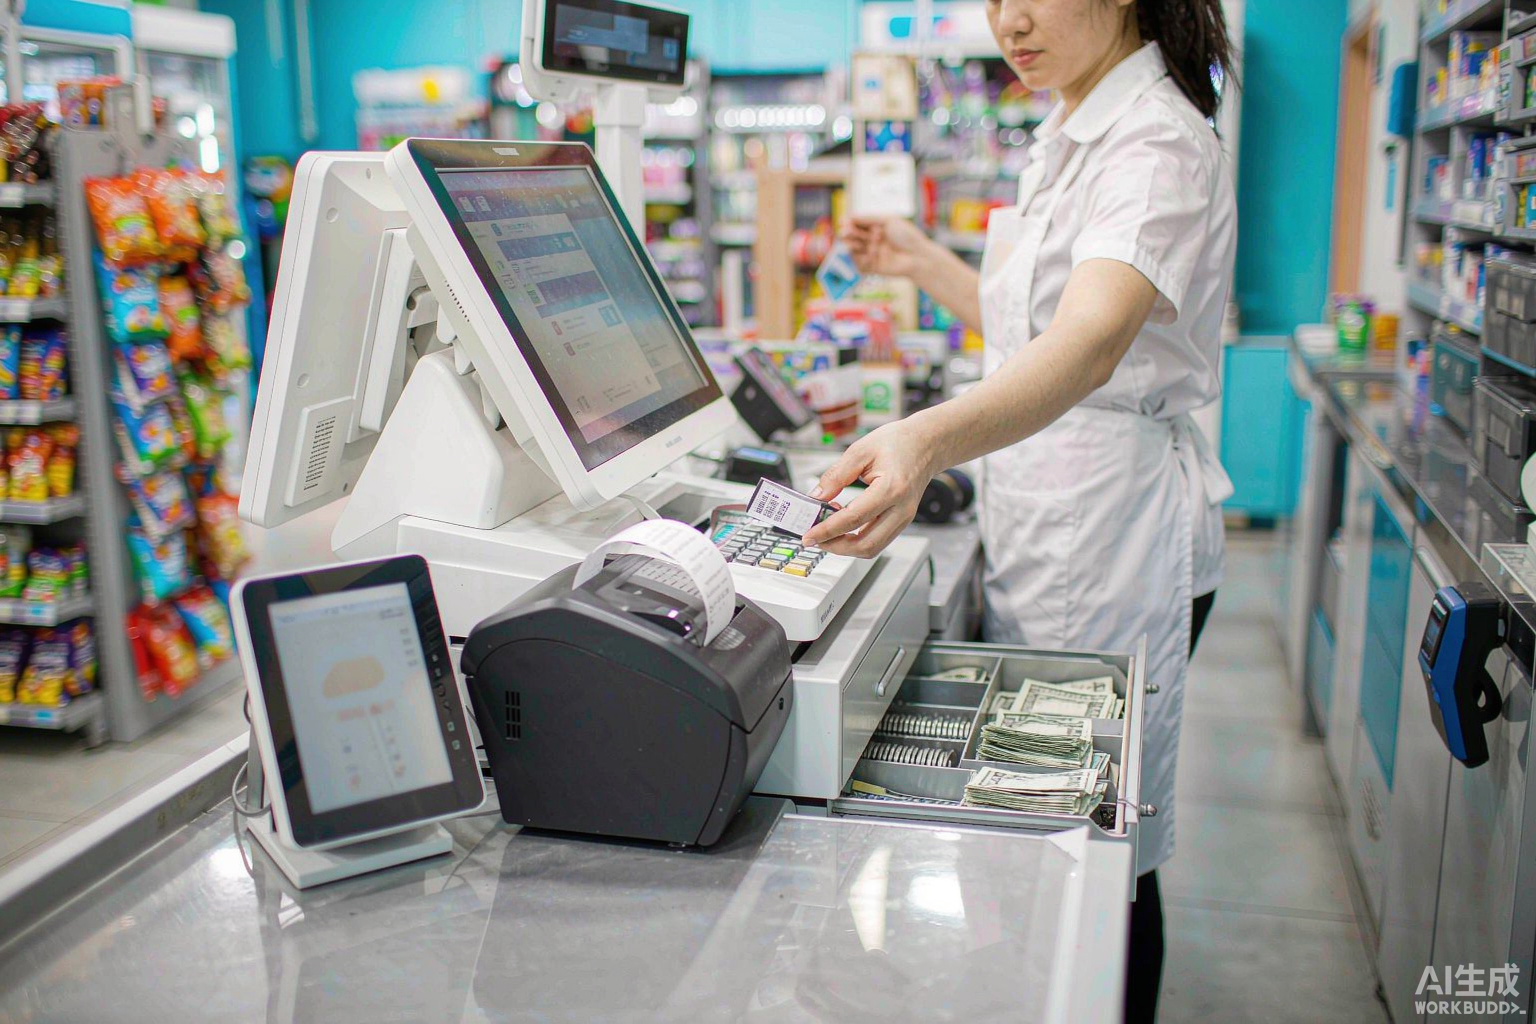
What Is a Cash Register and What Does It Do?
A cash register is a device that records a sale, calculates the total including tax, stores the cash taken in, and prints a receipt. That is the whole job. The reason the machine exists at all is that a business needs an accurate, tamper-resistant record of every transaction — not just for bookkeeping, but so that the money in the drawer can be checked against what the system says should be there.
That idea is older than most people realize. The first mechanical cash register was patented in 1879 by James Ritty, a saloon owner in Dayton, Ohio, who was losing money to staff theft. His device, nicknamed the “Incorruptible Cashier,” rang a bell on every entry so the owner could hear a sale being made from across the room. A few years later John Henry Patterson bought the design, founded the National Cash Register Company, and added the two features that define the register to this day: a printed receipt for the customer and a journal roll kept for the business. Almost every function on a modern machine — the drawer, the printed record, the running total — traces back to that design.
A cash register is not the same thing as a point-of-sale system, although the two are often used as if they were the same. A register is a standalone appliance: it does its own arithmetic, holds its own prices and prints its own receipt. A POS system is a computer running software, connected to a scanner, a display, a printer and a drawer. For a cashier standing behind the counter the daily motions feel almost identical, and that is the point — the training you learn on one transfers to the other.
Historically the two were clearly different. A traditional electronic cash register is a closed box you program by hand; a POS terminal is open hardware you load software onto. That line has blurred, because most registers sold today to small shops are simply compact POS terminals with a built-in receipt printer. The sections below use the words register, till and cashier machine interchangeably, because in a real store they all mean the machine at the checkout.
Register, till and cash drawer: what each word means
These three words get used loosely, and a new cashier hears all of them on the first day. Strictly, they are three different things:
- The register is the whole machine — the display, keypad, printer and the electronics that add up the sale and print the receipt.
- The till is a British and Irish word for the money that sits in the drawer at the start of a shift, and by extension for the drawer itself. In the United States the same thing is usually called the float or the starting till.
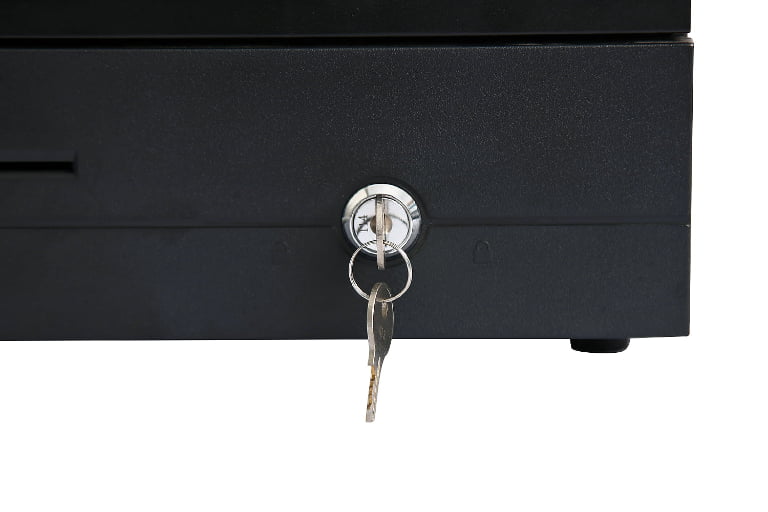
- The cash drawer is the lockable box that physically holds the notes, coins and slips. It is a separate component on most counters, connected to the register or the printer rather than built into it.
That last point is worth remembering, because it explains a whole category of problems later on: because the drawer is usually a separate part, it can break, jam or refuse to open independently of the register that is telling it to open.
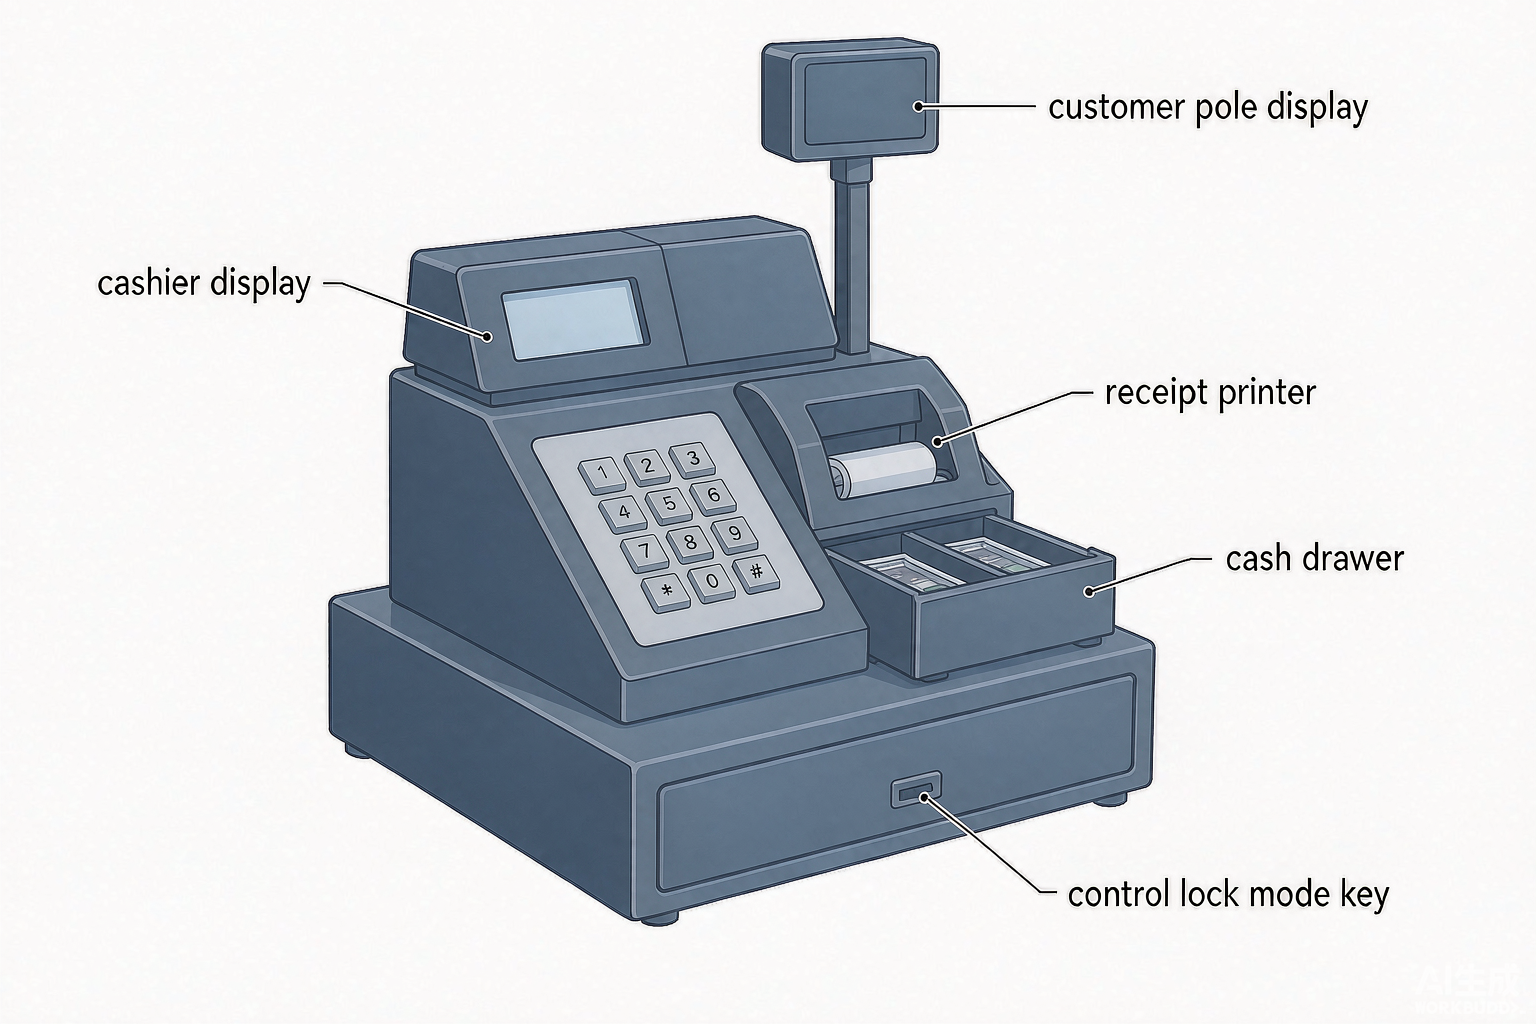
The Core Parts of a Cash Register
Every cash register, from a forty-year-old mechanical unit to a modern touchscreen terminal, is built from the same short list of parts. Knowing what each one is called makes training far quicker, because the person teaching you will point at a component and give it a name.
| Part | What it is called | What it does |
|---|---|---|
| Cashier display | Clerk display, operator display | Faces the cashier. Shows the item price, the running subtotal, prompts and error messages. On older registers it is a small two-line LCD; on a POS terminal it is the main touchscreen. |
| Customer display | Pole display, VFD display | A small screen that rotates to face the customer. Shows the price of the item just entered, the running total, and finally the change due. It exists so the customer can check the numbers in real time. |
| Keyboard | Keypad, department keys, PLU keys | Where amounts and codes are entered. Number keys enter prices; department keys assign an item to a tax category; PLU (price look-up) keys call up a stored price and name. |
| Receipt printer | Thermal printer, roll printer | Prints the customer copy. Modern units use thermal paper, which is quiet and fast but fades in heat; older units use an impact print head, which is louder but can print two colors and duplicate copies. |
| Journal printer | Audit roll, journal roll | Prints a second, internal copy of every transaction that stays with the business. On modern thermal registers this is replaced by an electronic journal stored in memory. |
| Cash drawer | Till, money box, drawer | The lockable box that holds notes and coins, plus checks and card slips. It is divided into compartments by denomination and opens only when a transaction is completed or an authorized no-sale is entered. |
| Control lock | Mode switch, manager key | A physical key switch that changes what the machine is allowed to do — for example between normal selling, programming and report reading. It is the simplest security control on the whole device. |
How the parts work together
The part that surprises new staff is that the drawer is not usually wired to the keyboard. On a traditional register the cash drawer is connected to the receipt printer by a short cable, and the printer sends a brief electrical pulse — called a drawer kick — when a sale is finalized. That is why the drawer can fail to open even though the register is working: the fault is often in the cable or the printer, not the drawer. On a POS terminal the same signal comes from the terminal instead, over a dedicated drawer port or USB. If you are building a counter from separate parts, it is worth understanding which device drives the drawer before you buy — our cash drawer hardware guide covers the interface chain in detail.
The mode switch, explained
On a traditional electronic register the control lock has a handful of positions, and learning them early saves a lot of confusion. The exact names vary by brand, but the pattern is almost universal:
| Mode | What it is for | Who can enter it |
|---|---|---|
| Off / Lock | Machine is idle or locked | Anyone with a key |
| Register (REG) | Normal selling — ringing up sales | Any cashier |
| Program (PRG) | Changing prices, tax rates, date and time | Manager only |
| X (read) | Print a report without clearing the totals | Manager only |
| Z (reset) | Print the end-of-day report and reset the day’s totals | Manager only |
If your store runs a POS terminal instead, this physical key is replaced by a software login. The idea is unchanged: a normal login lets you sell, while programming and closing the day require a manager-level password.
Thermal vs impact receipt printers
Whoever chose the register already decided one thing you will live with every shift: whether the receipt prints on a thermal head or an older impact head. The two behave differently and the difference shows up in small, daily ways.
| Thermal printer | Impact (dot-matrix) printer | |
|---|---|---|
| How it prints | Heats specially coated paper; no ink or ribbon | Strikes a ribbon onto ordinary paper |
| Noise | Almost silent | Audible across the counter |
| Speed | Fast — several lines a second | Slower, especially on long receipts |
| Copies | One copy per print | Can print two-color and duplicate copies at once |
| Consumables | Thermal rolls only | Rolls plus ribbon |
| Weak point | Print fades if the paper is stored somewhere hot or sunny | Ribbon runs out and receipts go blank; the print head wears |
The practical cashier takeaway is to know which one you have, because the two fail in different ways. A thermal receipt going pale usually means the paper roll has been sitting in a hot stockroom; an impact receipt going blank usually means the ribbon needs replacing. Both are fixable in a minute once you know what you are looking at.
Before Your First Shift: Setting Up the Register
A cashier does not normally program a register, but it helps to know what has to be set up once, because a surprising number of “the register is wrong” problems are actually setup problems. All of the following is done once by a manager or the shop owner, in programming mode or in the software’s settings screen.
| Setup task | Where it is done | Why it matters |
|---|---|---|
| Date and time | Program (PRG) mode or software settings | Every receipt and every report is stamped with it. Wrong time makes the day’s totals impossible to audit. |
| Tax rate | Tax or department settings | The register adds tax automatically, so a wrong rate quietly mis-prices every taxable sale. Check it after any tax change. |
| Departments and PLU codes | Department keys, or the product list | Departments group items for tax; PLU codes let a cashier enter a number instead of typing a price. Good PLU setup is the single biggest speed improvement at the counter. |
| Cashier accounts and PINs | Clerk or user settings | Each cashier needs their own ID so sales, voids and refunds can be traced to a person. Shared logins destroy that traceability. |
| Receipt header and footer | Store information settings | Prints the shop name, address and any return policy on the receipt. It is the store’s legal proof of purchase. |
| Receipt paper and print density | Physical loading, printer settings | Loaded paper and a sensible darkness setting prevent the faded or blank receipts that cause most customer disputes. |
The opening float
Before the first customer of the day, the drawer is loaded with a fixed amount of small change called the opening float or starting till. The float is counted and recorded so that at the end of the shift the cash in the drawer can be compared against sales. A typical float is enough to make change on the first thirty or forty sales: plenty of ones and fives, a reasonable number of quarters, and a few rolls of smaller coins.
The recommended way to count the float is a blind count: the cashier counts the money and enters the total without the machine telling them what it expects first. If the register shows the expected figure before you count, people tend to count towards it rather than honestly, and a genuine shortage gets hidden. Blind counting catches problems on the shift where they happen instead of weeks later.
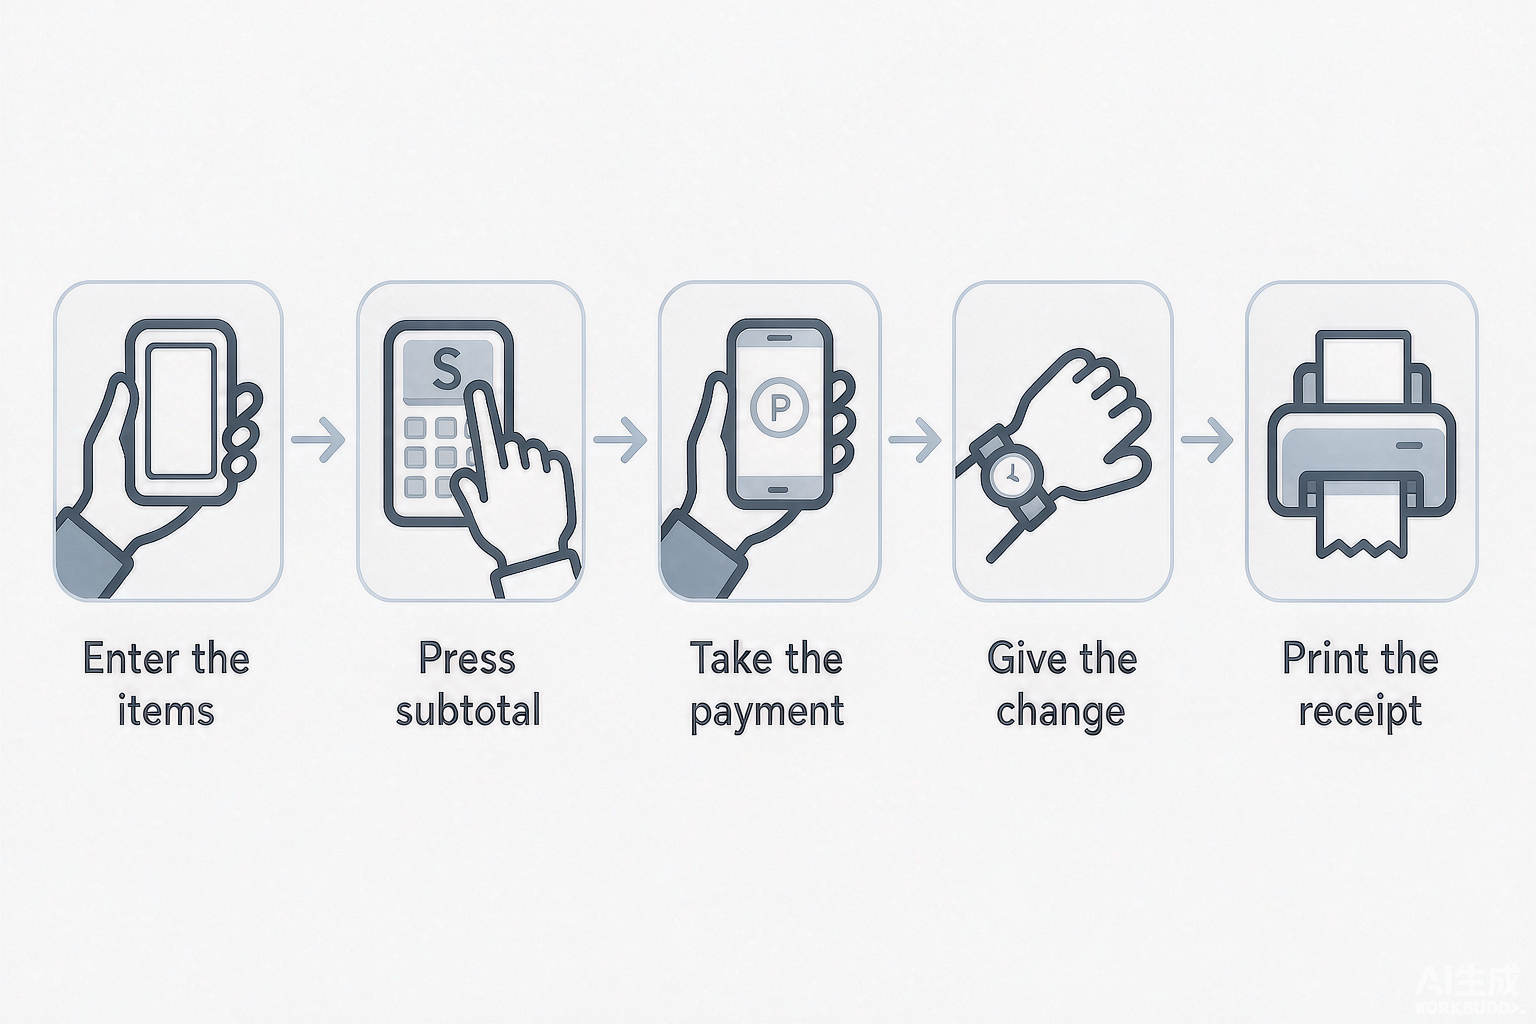
How to Use a Cash Register: Step by Step
This is the core transaction, in the order it happens. The exact button names differ between machines, but the sequence is the same on a traditional register and on a modern touchscreen terminal.
- Open the till and check the float. Confirm the drawer has enough change for the day and that the receipt roll is loaded. Open the drawer with a sale, not with the no-sale key, unless your store policy says otherwise.
- Log in. Enter your cashier ID or PIN, or swipe your staff card. On a traditional register you may also need to turn the mode key to Register. Never sell under another person’s login.
- Start the transaction. Press the Sale or New button so the register knows a fresh order is beginning.
- Enter each item. Scan the barcode, or key in the price and press the department key, or enter the PLU code. For multiple units of the same item, enter the quantity first, then the price and department, instead of scanning the same barcode ten times.
- Watch the display after every entry. Confirm the right item and price appear on the cashier display. Catching a wrong entry now takes one second; catching it after payment takes a refund.
- Apply any discount. Key the percentage or amount and press the discount key, or use the store’s preset discount button. Note whether the discount applies before or after tax — they are different amounts.
- Press Subtotal or Total. The register adds tax and shows the amount due. Say the total out loud to the customer — it is the cleanest way to avoid a dispute later.
- Take the payment. For cash, key in the amount the customer handed you and press the Cash or Amount Tendered key. For a card, press the card key and let the customer tap, insert or swipe on the card reader. For a split payment, enter the first amount, then apply the rest to the second method.
- Give the change. The register shows the change due and the drawer opens. Never place the customer’s cash in the drawer before you have counted out their change, or you will lose track of how much they gave you.
- Hand over the receipt and close the drawer. Give the receipt, close the drawer immediately, and move to the next customer. A drawer left hanging open is both a security risk and the fastest way to lose money a bill at a time.
| Step | Typical key or screen | What to watch for |
|---|---|---|
| Enter an item | Scan, or price + department key, or PLU code | Wrong item or wrong price on the cashier display |
| Repeat an item | Quantity, then price, then department | Ringing the same item twice instead of using quantity |
| Discount | Percentage or amount, then the % key | Whether the discount is applied before or after tax |
| Subtotal / Total | Subtotal or Total key | Read the total back to the customer |
| Cash payment | Amount tendered, then Cash key | Entering the amount received, not the amount due |
| Change | Displayed on the cashier and customer display | Counting change from the money handed over, not from the drawer |
| Card payment | Card or Credit key, then the card reader | Waiting for approval before printing the receipt |
Ringing up multiples and items without barcodes
Two situations trip up beginners more than any others: selling several of the same item, and selling something that has no barcode at all, such as loose produce, a hand-made item or a service.
- Multiple units. Do not scan the same barcode five times. Enter the number of units first, then scan once or enter the price once. The register multiplies it for you and the receipt shows a single clean line instead of five.
- Loose or unlabelled produce. Weigh the item, enter the weight or the amount, then press the department key that matches the category. Many stores attach a small printed label with a barcode to loose items precisely so they can be scanned like anything else.
- Services and fees. Items with no physical stock — a repair fee, a delivery charge, a gift-wrap fee — are usually set up as their own department or PLU key so they still land in the right category for tax and reporting.
- Mixed baskets. Scan the barcoded items first to build the order on screen, then handle the weighed and manual items, then press Subtotal once. Keeping all manual entries together avoids a second subtotal and speeds the queue.
Taking a card payment
Card payments have almost no arithmetic, which is why they are the easy half of the job, but they still have an order. Select the card payment option on the register, then let the customer tap, insert or swipe on the card reader. Wait for the approval message on the terminal screen before you print or hand over anything. If the payment is declined, do not run it again blindly — ask for another card or another method, and never release the goods on a screen that did not clearly say approved. Keep the card slip handling consistent: whether your store keeps them, files them or prints nothing at all, do it the same way every time so a disputed sale can still be traced.
Making Change Correctly: The Count-Up Method
New cashiers worry most about change, and it is the easiest part of the job once you stop doing subtraction. Do not subtract the total from the money you were handed. Instead, count up from the total to the money handed over, out loud, in the customer’s hand. The register gives you the exact figure, and the count-up method is the double-check that catches its mistakes and yours.
The technique is simple: start at the price, add coins until you reach the next round number, then add notes until you reach the amount the customer gave you. Say each step out loud as you place it in their hand, so they can follow along and so you keep your own place.
| Add | Running total | Say |
|---|---|---|
| Two pennies | $7.40 | “seven forty” |
| One dime | $7.50 | “seven fifty” |
| Two quarters | $8.00 | “eight dollars” |
| Two one-dollar bills | $10.00 | “ten” |
| One ten-dollar bill | $20.00 | “twenty” |
Habits that prevent change errors
- Leave the customer’s bill on top of the drawer, not inside it, until the change is given. This is a standard loss-prevention habit and it removes the commonest error of all — forgetting what denomination you were handed.
- Enter the amount tendered before the drawer opens. On a modern terminal the drawer is programmed not to open until the amount received is keyed in, which forces the right change onto the screen every time.
- Count change back into the customer’s hand, never onto the counter, and never into the drawer.
- Keep the drawer tidy by denomination. A messy drawer slows every transaction and hides a shortage until closing time.
- Treat the no-sale or open-drawer key as a supervised action. It is the single most abused button on a register; most stores log every use.
When the drawer runs low on change
A few hours into a busy day the drawer fills up with large notes and runs out of small ones, which is exactly when change mistakes happen. There are two standard fixes. The first is the cash drop: when the notes in the drawer pass a set limit, the cashier removes the excess and places it in a safe, recording the amount and keeping the drawer stocked with change. The second is to bank a larger note deliberately — if a customer pays with a $50 bill early in the day, ask a colleague or a manager whether to take it, or the drawer will be out of change within the hour.
Neither of these is a cashier’s judgment call in most stores — they are written into the till policy, along with the float limit and the amount above which a note gets dropped. Learn the two numbers for your store, and the drawer stops being a source of surprises.
Discounts, Voids, Returns and Refunds
Most days are nothing but straightforward sales, but the exceptions are where new staff make expensive mistakes. The important distinction is between correcting a transaction that has not been paid for, and undoing one that has. The first is an internal correction; the second moves real money and should follow store policy.
| Situation | What it means | What to do |
|---|---|---|
| Price entered wrongly | The item has not been paid for yet | Void the line and re-enter it. On a touchscreen, tap the wrong line and remove it. |
| Customer changes their mind mid-sale | The item has not been paid for yet | Void the line. If it is the whole order, cancel the transaction and start again. |
| Whole transaction must be canceled | The sale has not been finalized | Use Cancel Transaction or Void Sale. Many systems require a manager code for this. |
| Customer returns an item | The sale is already paid for | Follow the store’s refund policy. Use the Refund or Return function, choose the original payment method and get a manager approval where required. |
| Wrong item discovered after payment | The sale is already paid for | Refund the wrong item and ring the correct one. A same-day void is usually not possible once the payment has settled. |
| Discount applied to the wrong item | Discounts change the tax line | Void the line and re-enter it with the discount, rather than manually lowering the total. |
Two rules keep these situations safe. First, never correct a mistake by “adjusting the next sale” or by taking cash from the drawer — that hides the problem and creates a shortage somewhere else. Second, treat every refund and every no-sale as an event that is logged and, in most stores, approved by a manager. On a modern terminal this approval is usually a quick manager PIN or card swipe at the terminal instead of a key turn, which is faster and leaves a cleaner audit trail.
Shift Handover and End-of-Day Reports
A register does not just take money; it produces the numbers that prove the money is right. Two reports do almost all of that work, and they are named the same way on nearly every machine: the X report and the Z report.
| Report | When it is run | What it does |
|---|---|---|
| X report | Mid-shift, or before a handover | Prints the running totals for the shift so far and does not clear anything. You can run as many as you like. |
| Z report | End of the day, or end of the trading period | Prints the full day’s totals and resets the counters to zero. It is normally run once, and often needs a manager key or password. |
| Drawer count | At handover and at closing | The counted cash. Compared against expected takings to find an over or a short. |
| Per-cashier totals | At handover | Sales, voids and refunds broken down by login, which is why every cashier needs their own ID. |
How a handover works
- Finish with the drawer and the register in a neutral state — no part-finished transactions.
- Run an X report so you can both see the shift totals.
- Count the drawer and note the total. If your store uses a blind count, enter the figure without looking at the expected number first.
- Compare counted cash against expected takings. A small difference from change handling is normal; a large or repeated one is a process problem worth investigating the same day.
- Remove the notes above a set limit — for example, everything over the float — and drop them in the safe, then sign the handover.
- The next cashier counts their own float and starts their own shift under their own login.
At closing, the same process runs once more and ends with the Z report. Keep the Z report: it is the store’s record of the day, and it is what the books are reconciled against. On a modern POS terminal the Z report is usually emailed or stored to the cloud as well as printed, which means a lost paper roll is no longer a lost day of accounts.
How to Work a Cash Register in Different Stores
The transaction loop is identical everywhere, but each kind of store leans on different parts of it. If you are moving between stores, or training staff for a new format, these are the differences that matter most.
| Store type | What changes | What to watch for |
|---|---|---|
| Grocery and supermarket | High item counts, lots of produce and weighed goods | Quantity entry, PLU codes for loose produce, keeping the conveyor moving |
| Convenience store and gas station | Very fast, small baskets, restricted items | Age-restricted products, lottery and fuel, speed over everything |
| Restaurant and café | Orders tied to a table or a name, items sent to the kitchen | Table numbers, modifiers, splitting bills, adding a tip |
| Fashion, beauty and boutique | Low item counts, high prices, frequent returns | Discount codes, gift receipts, exchange versus refund |
| Pharmacy and specialty retail | Regulated items and insurance or ID checks | Patient or prescription details, identity checks at the till |
Grocery and supermarket
A grocery till is a speed game. Baskets are large, so quantity entry and a scanner you can use without aiming are worth more here than anywhere else. Produce without a barcode is handled with PLU codes, and memorising the twenty or thirty codes for your most common fruit and vegetables will do more for your checkout speed than anything else. Watch the running subtotal on screen and keep the belt clear; a grocery queue grows faster than any other.
Convenience store and gas station
Convenience stores run on small, fast, frequent transactions, so the register is often the same but the pace is much higher. Two things need extra care: age-restricted products, where the register usually prompts for a date of birth or an ID check and the prompt must be answered honestly; and combined purchases such as fuel plus in-store items, where it is easy to ring the items and forget the fuel or the other way around. Get into the habit of checking the display before pressing Total.
Restaurant, café and bar
In hospitality the register is usually a POS terminal with tables and covers rather than a simple item list. You will attach an order to a table or a name, add modifiers such as “no onions” or “extra shot,” send the order to the kitchen or bar, and settle the bill later — often split between two or three payers, sometimes with a tip added on the card. If you are working a register in a restaurant for the first time, the biggest new skill is not the machine but remembering which order belongs to which table, so use the table number every single time even when the place is quiet.
Traditional Cash Register vs Modern POS Terminal
The register you learn on is increasingly a POS terminal in a register-shaped box. The daily cashier workflow is almost identical, but the hardware underneath is different in ways that matter when a store grows or a machine breaks — and that difference is exactly the part a hardware manufacturer cares about.
| Dimension | Traditional electronic cash register | Modern POS terminal |
|---|---|---|
| What it is | A closed appliance with its own fixed firmware | A small computer running POS software |
| Item entry | Price plus department key, or a PLU code | Barcode scan, product search, or image tiles on a touchscreen |
| Prices and products | Programmed into the machine, by hand | Held in software, editable from a back office or the cloud |
| Receipt printer | Usually integrated; often impact print head on older units | Integrated or external thermal printer |
| Cash drawer | Driven by the printer’s drawer-kick signal | Driven by the terminal’s drawer port; drawer often supplied separately |
| Reporting | X and Z reports printed from the machine | Reports on screen, exported, or in the cloud; Z report still available |
| Products and pricing changes | Manual reprogramming at the machine | One update pushes to every terminal in every store |
| Multi-store use | Effectively no | Central pricing, central reporting, per-store data |
| Best for | A single small counter with simple, stable pricing | Any store that scans barcodes, changes prices, or runs more than one lane |
For a cashier, the practical upgrades on a POS terminal are speed and clarity: a scanned barcode cannot be mis-keyed, and the screen confirms the item and price instead of asking you to trust a printed roll. For an owner, the upgrade is that prices, products and reports become company-wide rather than locked inside one box behind the counter.
What to check on the hardware itself
If you are choosing the machine rather than just using it, the differences above translate into a short hardware checklist. These are the points that separate a register that survives years of daily use from one that starts failing in the first busy season:
- The drawer interface. Confirm how the drawer is driven — printer drawer-kick port, or a dedicated drawer port on the terminal — and that the cable and connector match. Mismatched drawer connections are a common cause of a drawer that will not open.
- The printer. Thermal printers are faster, quieter and cheaper to run; impact printers can produce two-color and duplicate copies. Match the printer to how the store actually prints.
- The screen and touch. A capacitive touchscreen tolerates greasy fingers and quick wiping far better than an older resistive panel. Brightness matters if the counter faces a window.
- The ports. Card reader, scanner, drawer and printer all need a home. Count the ports you will actually use and add one spare.
- Service life. A register is on for every hour the store is open. Hardware built for continuous duty costs more up front and less per year.
A retail counter is a system, not a single box, which is why it is worth choosing the register with the scanner, drawer and printer in mind. If you are building or refreshing a checkout counter, our smart retail solutions pages show how the pieces are matched, and the cash register hardware range covers the machines themselves.
Common Beginner Mistakes and How to Avoid Them
Almost every new-cashier error falls into a short list, and every one of them is preventable with a habit rather than with more training time.
| Mistake | Why it happens | The fix |
|---|---|---|
| Putting cash in the drawer before counting change | Rushing during a queue | Leave the tendered bill on top of the drawer until the change is handed over |
| Ringing the same item twice | Scanning quickly without watching the screen | Use the quantity key, and read the cashier display after every scan |
| Guessing change instead of using the register | Nervousness under pressure | Enter the amount tendered and let the machine show the change; count up as a back-up |
| Leaving the drawer open | Distraction between customers | Close the drawer the moment the transaction ends |
| Sharing a login or PIN | Convenience on a busy shift | Every cashier uses their own ID so sales and refunds stay traceable |
| Correcting mistakes by adjusting the next sale | Wanting to avoid calling a manager | Void or refund properly — papering over it creates a shortage elsewhere |
| Ignoring the receipt | Assuming the printer is always right | Check the printed total and store name; faded or blank receipts point to a printer setting problem |
| Not counting the float at the start | A rushed opening | Always blind-count the float; it is the only way to prove a shortage began on someone else’s shift |
A separate but related point: a cash drawer that will not open is nearly always a hardware fault rather than a cashier mistake. Before calling anyone, check the cable between the printer and the drawer and confirm there is paper in the printer, since the drawer kick signal travels that path. Our cash drawer troubleshooting guide walks through the checks in order.
Frequently Asked Questions
How do you use a cash register step by step?
Open the till and check the float, log in with your own cashier ID, start a new sale, then enter each item by scanning a barcode, entering a price with a department key, or keying a PLU code. Press Subtotal or Total to add tax and show the amount due, take the payment, key in the cash amount received, and give the change the register calculates. Hand over the receipt and close the drawer immediately. The sequence is the same on a traditional register and a modern POS terminal.
How do you operate a cash register for the first time?
Before your first customer, confirm three things: the drawer has enough small change for the shift, the receipt roll is loaded, and you are logged in under your own ID. Then run a practice transaction with a colleague. Watch the cashier display after every entry, key in the amount tendered rather than guessing, and count change back using the count-up method. A few practice sales remove almost all of the first-day nerves.
How do you make change on a cash register?
Key in the amount the customer handed you and press the Cash or Amount Tendered key. The register shows the exact change due and opens the drawer. Count the change back into the customer’s hand, starting from the amount due and counting up to the amount they gave you. For a $7.38 total paid with a $20 bill, you count up: two pennies to $7.40, a dime to $7.50, two quarters to $8.00, two ones to $10, and a ten to $20.
What is the difference between an X report and a Z report?
An X report reads the totals for the shift so far without clearing anything, so it can be run as often as you like — mid-shift or at a handover. A Z report reads the day’s totals and resets the counters to zero, so it is normally run once at the end of the trading period and often needs a manager key or password. Both are usually printed, and on a modern terminal the Z report is commonly emailed or stored in the cloud as well.
How do you void a mistake on a cash register?
If the sale has not been paid for, remove the line you entered wrongly — usually by pressing a Void or Delete key straight after the entry, or by tapping the wrong line on a touchscreen and removing it. To cancel the whole sale before payment, use the Cancel Transaction or Void Sale function, which often needs a manager code. If the customer has already paid, you cannot usually void the sale; you process a refund instead.
What is the difference between a void and a refund?
A void cancels a transaction before the payment has settled, so money never actually transfers between the customer and the store. A refund reverses a sale that has already been paid for, so money moves back to the customer. You can generally void a sale only on the same day and only before it has settled; a refund can be processed later and usually follows the store’s written return policy with manager approval.
Do I need a cash register or a POS system?
A traditional cash register is a standalone appliance that holds its own prices and prints its own receipts, which suits a single small counter with simple, stable pricing. A POS system is a computer running software, connected to a scanner, display, printer and drawer, which suits any store that scans barcodes, changes prices often, or runs more than one lane. Most registers sold to small shops today are compact POS terminals, so the practical difference for a cashier is small.
Why does my cash register drawer not open?
On most traditional registers the drawer is opened by a signal from the receipt printer, not from the keyboard. If the drawer will not open, check the cable between the printer and the drawer, confirm there is paper in the printer, and make sure the sale actually finalized. On a POS terminal, check the drawer cable at the terminal end and confirm the drawer port is enabled in the software before assuming the drawer itself has failed.
Can a cashier use a register without a manager?
Yes for normal selling. A cashier can turn the mode key to Register or log in with their own software account and ring up sales, take payment and print receipts. Programming prices, changing tax rates, running the Z report and approving refunds or large voids are normally restricted to a manager key or password, which is what keeps the audit trail meaningful.