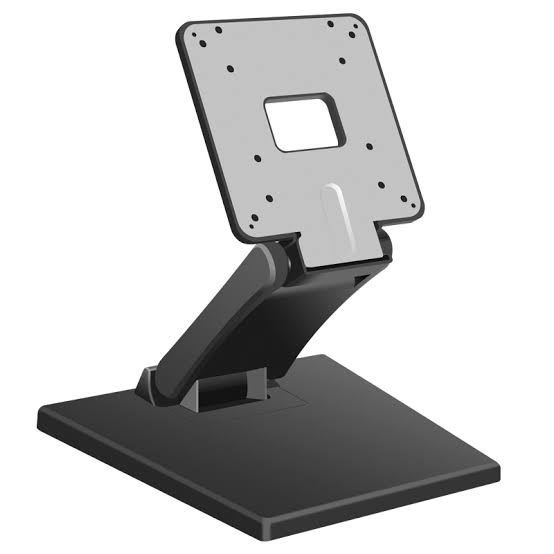
A POS system is only as good as the person using it at 6:58 pm on a Friday, when the queue is eight deep and the receipt roll has just run out. Most "how to use a POS system" guides list features. This one walks through the exact workflow a cashier, server or manager touches at every point in a trading day, so a new hire can be useful on their first shift and an owner can build a training plan that survives staff turnover.
This guide assumes you already own or are about to install a modern POS system: a touch terminal or tablet running POS software, with a receipt printer, cash drawer, barcode scanner and card reader attached. If you are still deciding what a POS is, our overview of what a POS system is covers the definitions, and we come back to the cash-register difference below. Everything here is about operating the software — logging in, ringing up a sale, editing a ticket, taking card and cash payments, issuing refunds, counting stock, reading reports — because that is the part staff actually have to learn. What a POS system is, and how to physically install one, are covered elsewhere.
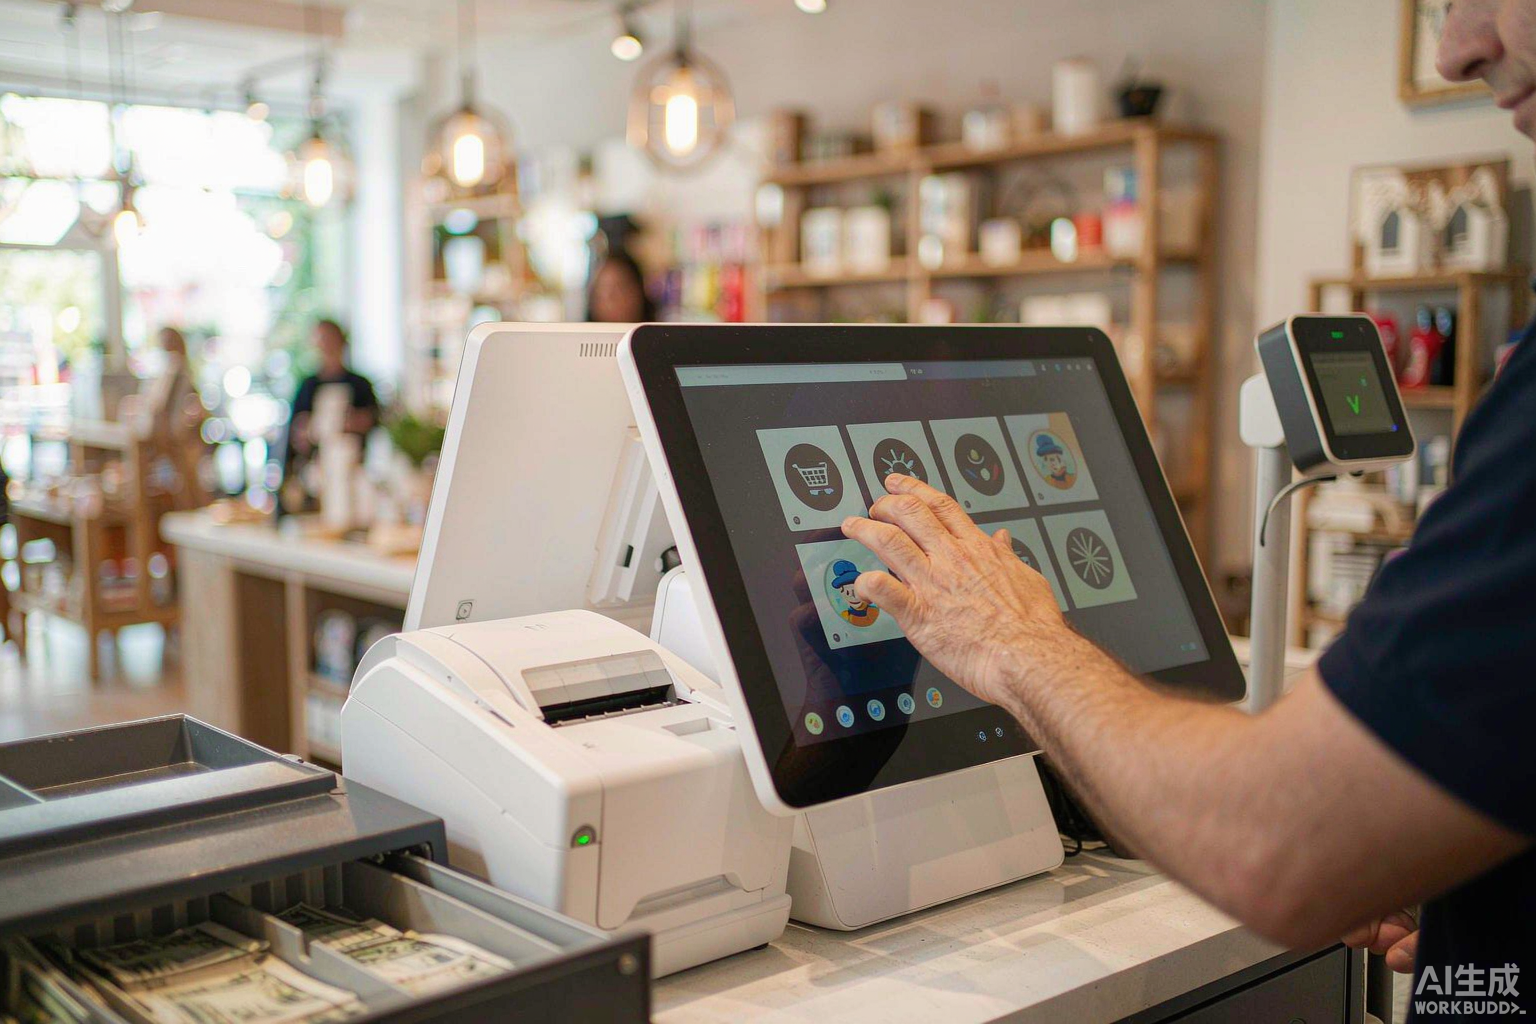
A Day With Your POS: From Open to Close
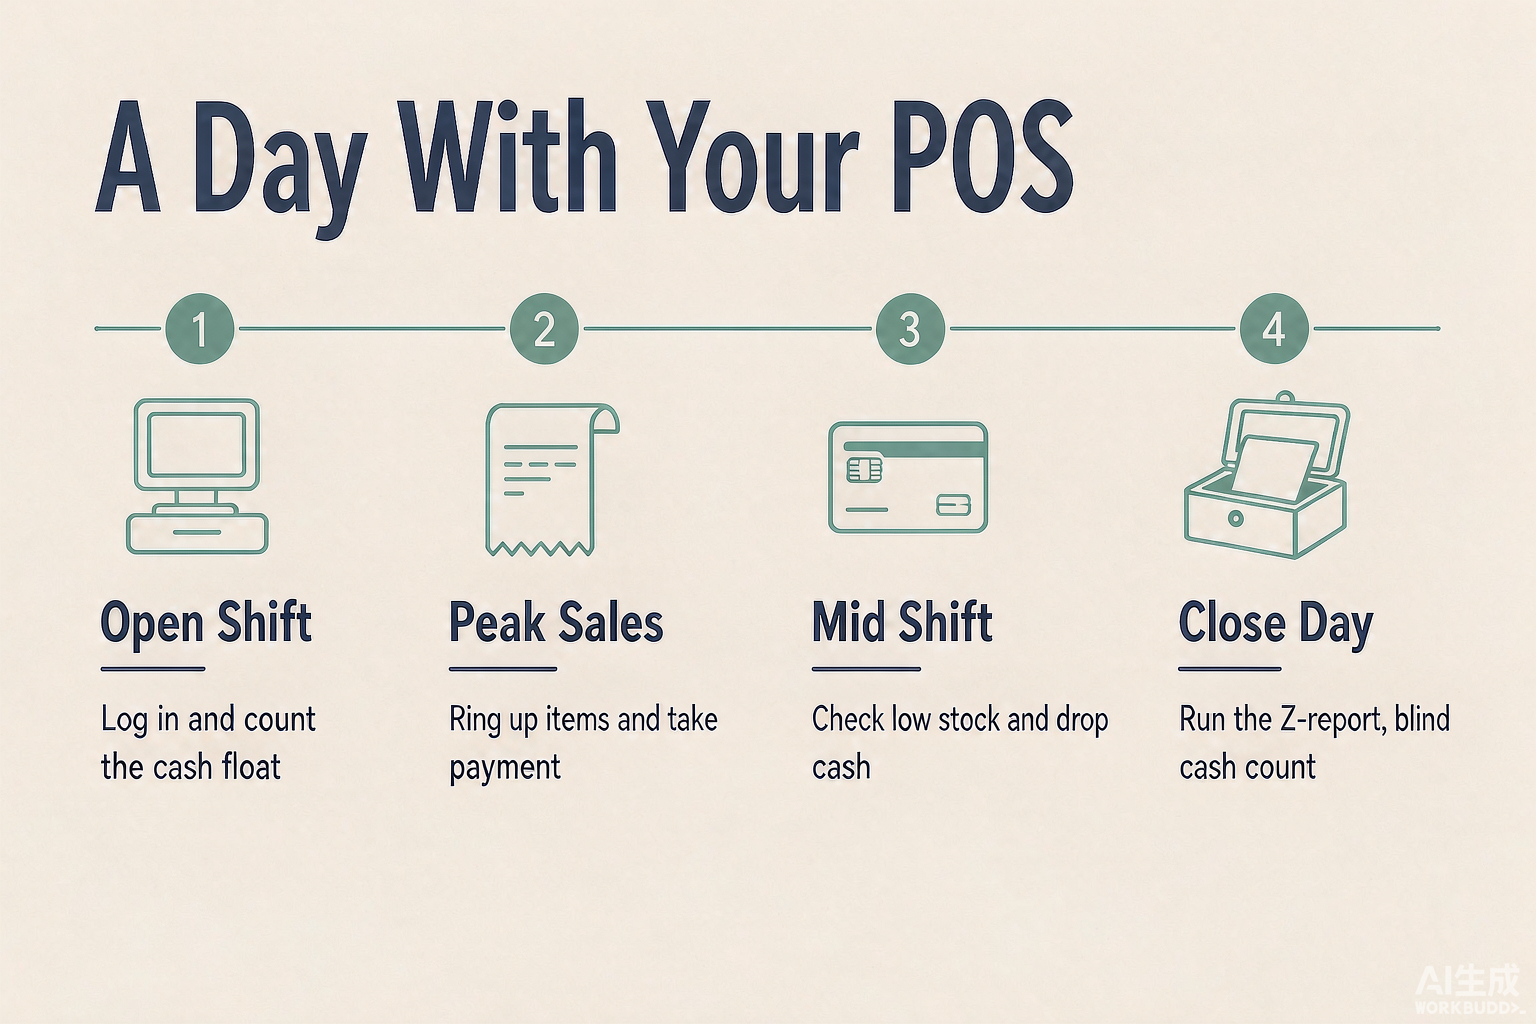
The fastest way to understand how a POS system is used is to follow one through a single day. Nothing below is a feature list; it is the sequence of actions a real operator performs, and it is the order this guide is built in.
| Time | What the operator does | Where it is covered |
|---|---|---|
| 08:45 — open | Log in with a staff PIN, count and record the opening cash float, check receipt paper and that the card reader is online, confirm the menu or price file has synced | Setting up before your first shift |
| 09:00 — first sale | Ring up items, apply a discount, take a card tap, print or email a receipt | Opening, editing and ringing up a sale |
| 10:30 — correction | A customer changes their mind; void the line before payment or refund it after | Refunds, voids and corrections |
| 12:30 — peak | Run multiple tickets at once, split tables, process cash and card in the same order, keep the queue moving | Taking payment, split tenders |
| 15:00 — mid-shift | Cash up the drawer and drop excess to the safe; check the low-stock alert on two items | Stock counts and reports |
| 18:00 — dinner rush | Open tables, fire courses to the kitchen screen, move a table, split a bill three ways | Restaurant POS section |
| 21:30 — close | Close the day, print the Z-report, do a blind cash count, log out every operator | Stock counts and end-of-day reports |
Two things stand out from that timeline. The first is that almost every action is a software action — the hardware is mostly a machine that carries the software. The second is that the money-losing mistakes cluster in three places: not opening the drawer correctly, mis-keying a correction at peak, and closing the day without a reconciliation. Those three are where the rest of this guide spends the most effort.
Retail and restaurant operators follow the same skeleton but diverge in the middle. A retail sale is usually short and terminal: scan, total, pay, done. A restaurant sale can stay open for ninety minutes, move between tables and be paid by three different people. The setup, payment, correction and reporting logic is identical, which is why this guide teaches one workflow and then adds a restaurant section rather than splitting into two articles.
It is also worth naming the reason the sequence below is ordered the way it is. You cannot train corrections before sales, because a void only means something once a sale exists. You cannot reconcile a drawer you never opened. Each section depends on the one before it, and a training plan that jumps straight to the interesting features is the reason new staff freeze at the till.
What You Are Actually Operating: A Modern POS, Not a Cash Register
A cash register totals a sale and pops a drawer. A modern POS system records the whole transaction as structured data: which items, which staff member, which payment method, which time, and what the inventory did afterwards. That difference is why "how to use a POS system" is mostly a software skill rather than a keypad skill.
If you are looking for the keypad-and-journal tape training of a traditional electronic cash register, that is a different device and a different guide. This article is about operating a POS system — the screen-and-software workflow that dominates new retail and restaurant deployments. On a modern POS, the four blocks below are what you are actually driving.
| Block | What it is | What the operator does with it |
|---|---|---|
| POS software | The application that holds the menu or product catalog, prices, tax rules and transaction logic | Log in, open a sale, add items, apply discounts, take payment, close the day |
| Terminal | The touch screen, all-in-one terminal or tablet the software runs on | Tap the screen; keep it clean and charged; report a frozen or unresponsive screen |
| Peripherals | Receipt printer, cash drawer, barcode scanner, customer display | Load paper, ring the drawer, scan items — and know which action maps to which device so faults can be described |
| Payment acceptance | The integrated or paired card reader / terminal that authorises card and mobile payments | Present the reader, confirm the amount, prompt for tip, resolve a decline |
The practical consequence for training is that a new operator needs to understand the software flow first and the hardware only well enough to keep it running and to describe a fault precisely. "It says offline" and "the screen is frozen" send an engineer in two very different directions, and a staff member who knows which block failed saves hours.
It helps to think of the skill in three levels. At the first level a cashier needs to ring a sale and take a payment without help. At the second, a supervisor needs to correct mistakes, approve refunds and reconcile a shift. At the third, a manager needs to configure the system — products, permissions, tax, printers and payments — and read the reports the first two levels generate. Most POS training falls down because it mixes the three, teaching everyone a bit of configuration and nobody a complete sales flow.
Setting Up the POS Before Your First Shift
You cannot use a POS system well until it has been configured, and the configuration is an owner or manager job, not a cashier job. In practice there are four setup areas, and skipping any one of them produces the kind of error that shows up at the worst possible moment. For the physical installation itself, see our guide to POS installation; this section is about the configuration a manager completes inside the software before go-live.
Products, menus and inventory
Every item a cashier can sell should exist as a record with a name, price, tax category and department. For retail, that means a product catalog with barcode mappings; for restaurants, a menu structured by category with modifier groups (size, cooking temperature, sides). Set stock quantities where you intend to track inventory, and decide which items are counted and which are simply sold.
Staff profiles and permissions
Each operator should have their own login — a PIN, a swipe card or a username and password — never a shared manager account. Individual logins are what make per-staff sales, voids and discounts traceable. Permissions decide who can apply a manual discount, issue a refund, void a completed sale or open the drawer without a transaction. As a default, cashiers should not be able to refund or discount without approval.
Payment terminal binding
The card reader has to be paired to the POS and tested end-to-end before opening day. Confirm the reader is bound to the right merchant account, that the tax and tip logic on the terminal matches the POS, and that a test card sale in each mode (tap, insert, swipe) settles correctly. Where the reader is integrated with the POS rather than standalone, the amount is sent from the sale automatically and mismatched totals should be impossible — verify that too.
Receipt printer and cash drawer configuration
The printer needs the right paper width, the right header (store name, address, tax number), and the correct item grouping so a receipt is legible. The cash drawer is usually triggered by the printer or by the terminal, so if the drawer does not open when the software says it should, the fault is often the printer-to-drawer cable rather than the drawer. Our thermal printer guide for retail receipts covers the paper and print-quality settings that most often need correcting.
| Setup task | Where it lives | Who owns it | Do not go live without it |
|---|---|---|---|
| Product and menu records | POS back office / web portal | Owner / manager | Every sellable item priced and taxed |
| Modifier and combo groups | Menu builder | Manager | Sizes, cooking temps and add-ons behaving correctly |
| Tax rates and rules | Tax settings | Owner / accountant | Local sales tax applied per item category |
| Staff logins and roles | User management | Manager | One login per person; refunds and discounts gated |
| Payment terminal pairing | Payment settings | Manager / provider | Test card sale in tap, insert and swipe |
| Receipt layout and paper | Printer settings | Manager | Correct width, header and item grouping |
| Cash drawer trigger | Printer / drawer settings | Manager | Drawer opens only on a cash sale or authorized action |
| Opening float and closing rules | Shift settings | Owner / manager | Documented opening float and reconciliation step |
If you are migrating from an older system, budget time to import the product catalog and staff list rather than re-keying them by hand. Almost every POS platform accepts a CSV import, and hand-entering a few hundred items is where prices get mistyped and tax categories get missed. Where the old system tracked stock, import the counts too, then do one full physical count in the first week so the new system starts from a number you trust.
One configuration decision deserves calling out because it is invisible until it causes trouble: which peripherals are bound to which terminal. If a store has two lanes, the printer, drawer and card reader on lane one need to belong to lane one, and the software needs to know that. A terminal that sends a receipt to the wrong printer, or opens the wrong till, is not a hardware fault — it is a binding that was never set. Confirm the mapping device by device before go-live.
Opening, Editing and Ringing Up a Sale
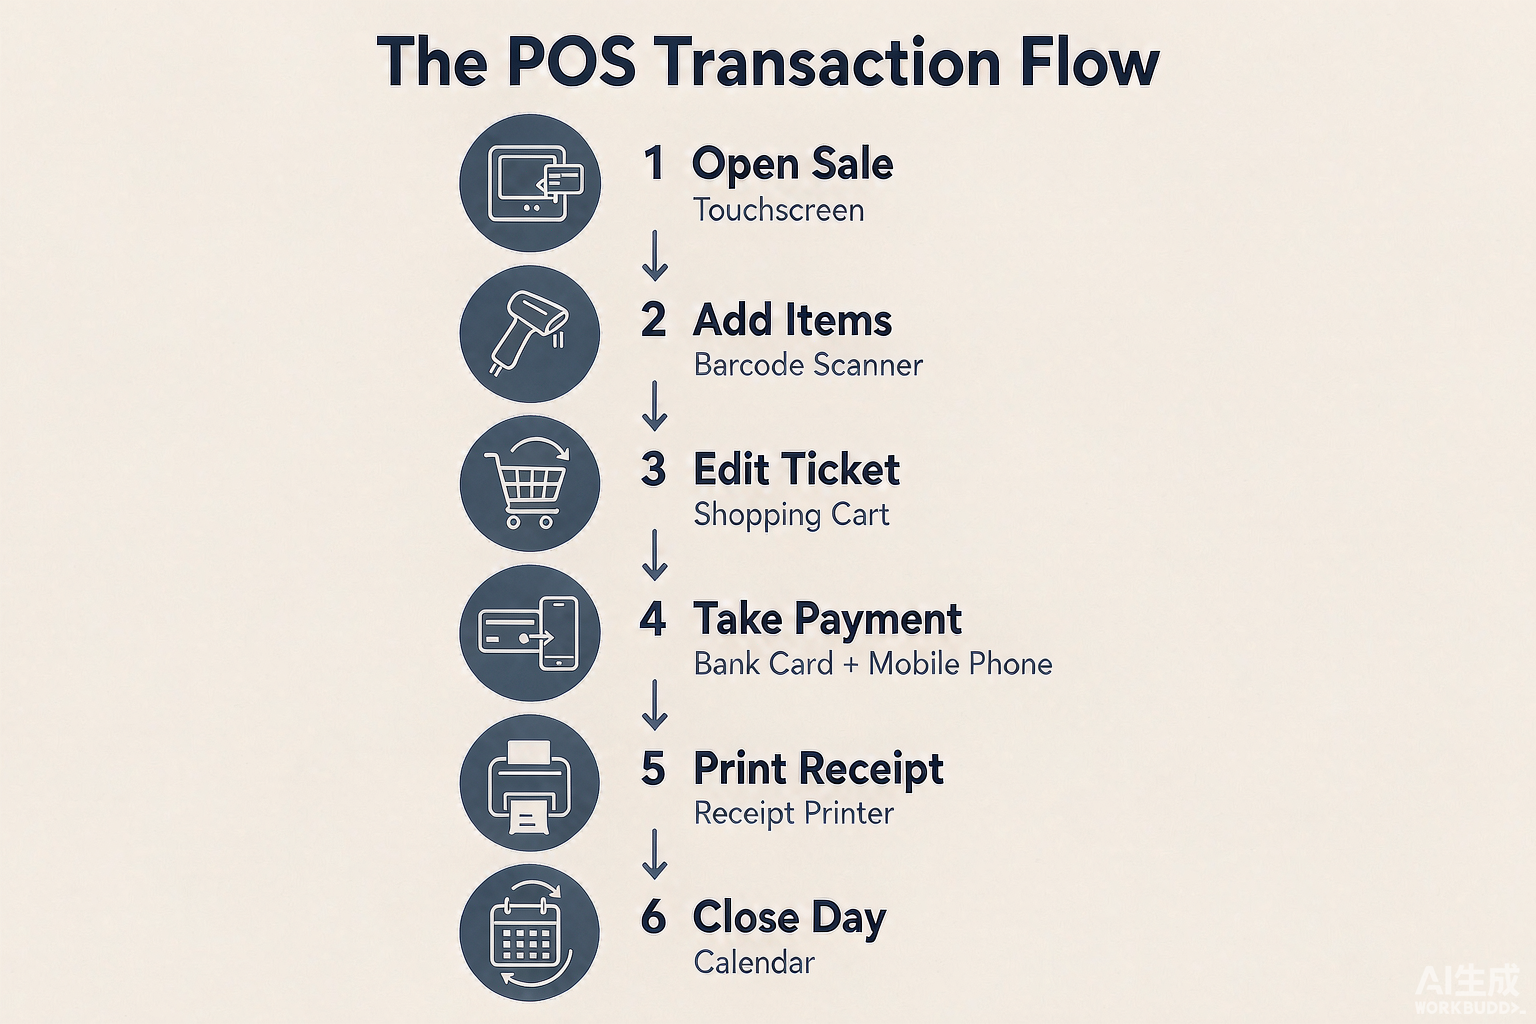
The core transaction is the same across almost every POS: log in, open a sale, add items, review the total, take payment, issue a receipt. The skill is in the edits that happen between those steps, because that is where most operator errors occur.
Logging in and opening a shift
Start by logging in with your own credentials and, where the system supports it, opening a shift with a counted cash float. Recording the float at the start is what makes the end-of-day count meaningful — without it, nobody can tell whether the drawer is short or simply started light.
Adding items: four ways
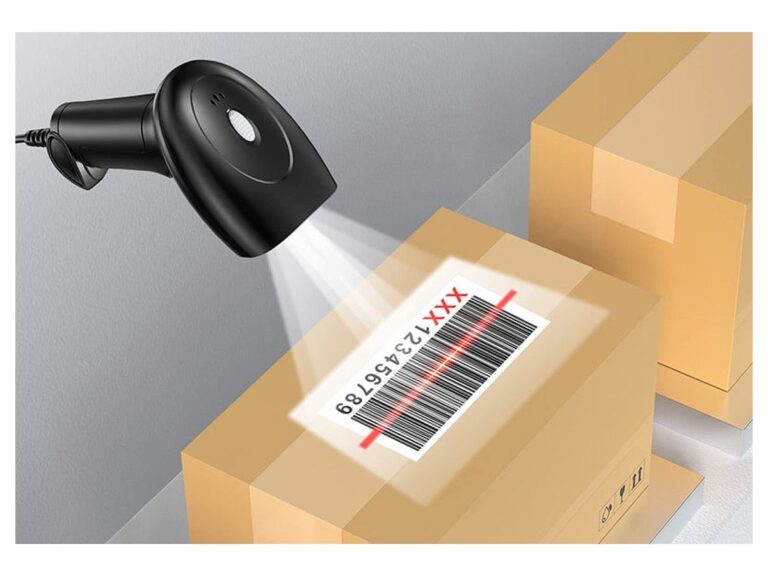
- Scan. Scan the barcode with the handheld or counter scanner. Fastest and least error-prone for barcoded retail goods.
- Tap a tile. Select the product or menu item from a screen of tiles or categories. The standard method in restaurants and among frequently sold lines.
- Search by name or SKU. Type the item name or code when it has no barcode or the tile is buried.
- Manual entry. Enter an open-price item or a custom amount. Treat this as the exception and audit it — open-price lines are where manual mispricing hides.
Editing, splitting and moving a ticket
Editing is the part new staff underestimate. The common operations are:
- Change quantity on a line rather than adding the same item twice.
- Add a modifier (no onion, extra shot, size large) through the modifier group so the price and the kitchen instruction both update.
- Remove or void a line before payment — the sale total recalculates immediately and the removal is logged against your login.
- Move a ticket between tables, or merge one table into another when guests combine.
- Split a bill by item, by seat or by amount so each guest pays for what they had.
- Park and recall a ticket on a restaurant POS so you can serve a second guest without losing the first.
| Step | Action | What to watch for |
|---|---|---|
| 1. Open a sale | Start a new transaction and choose the order type (in-store, takeaway, delivery, dine-in) | Wrong order type changes tax, service and routing — confirm it first |
| 2. Add items | Scan, tap, search or manual entry | Never scan the same item twice; watch the quantity column |
| 3. Adjust | Quantity, modifier, price override, line void | Price overrides should require approval and be reportable |
| 4. Review | Read the subtotal, tax, discount and total back to the customer | Confirm the total on screen matches the amount you are about to charge |
| 5. Tender | Take payment (next section) | Do not hand over goods before the payment shows as approved |
| 6. Receipt | Print, email or text the receipt; open the drawer for cash | Offer the receipt — emailed receipts cut paper cost and error disputes |
Scanning is the fastest and the least error-prone method, which is also why it is the one to standardize on. A handheld scanner or an omnidirectional counter scanner reads a barcode in a fraction of a second and removes the two failure modes of manual entry: transposed digits and wrong item picked. If scanners are failing to read first time, the cause is more often a damaged or badly printed label, dirt on the scan window or the wrong symbology enabled in settings than a scanner that has stopped working. Cleaning the scan window and checking the label before blaming the device solves most of it.
Manual entry should be a controlled exception. Give every manual or open-price line a reason, require approval above a value, and review the manual-entry count in the reports. A shop where a large share of sales are manually entered has either a catalog problem or a pricing-control problem, and the sales report will not tell you which until you look.
Taking Payment: Cash, Card, Mobile and Split Tenders
Payment is where a POS earns its keep. A modern system takes the amount from the sale and routes it to the right method, records how it was paid, and reconciles the drawer against those records at close. Learning each method properly is what keeps the end-of-day count straight.
Cash
Enter the amount tendered, and the POS calculates the change. Cash sales are the only type that open the drawer as part of the normal flow, and the only type where the drawer contents have to be counted against a record. Train staff to enter the exact amount received rather than rounding, because the change calculation is the first thing that goes wrong under pressure.
Card and contactless
Insert or tap on the paired reader. When the reader is integrated, the POS sends the exact total and the operator should never type an amount on the terminal — a manual entry on the card reader is how a mismatch between the sale and the settlement appears. Confirm the approval on screen before completing the sale, and never release goods on a "processing" or "call authorisation" state.
Mobile wallets, QR and gift cards
Mobile wallets authorize over contactless in the same way as a card tap. QR payments follow the provider flow: either the customer scans a code on your customer display, or you scan theirs. Gift cards and store credit are tendered through the POS, and the remaining balance should print on the receipt so there is no argument at the next visit.
Split payments and partial tenders
Splitting payment is routine, not an exception: part gift card and part card, half cash and half card, or three guests on three cards. The rule that prevents errors is to record the first tender, let the POS show the remaining balance, and take the second against that balance rather than against the original total. Never work the arithmetic out in your head — the balance on screen is the source of truth.
| Method | How it is taken | Best for | Watch-outs |
|---|---|---|---|
| Cash | Enter amount tendered; POS calculates change; drawer opens | Small tickets, tips, customers who prefer privacy | Exact opening float; blind count at close; watch for mis-keyed amounts |
| Card (insert) | Chip insert on the paired reader | High-value and higher-risk transactions | Never key the amount on the reader; wait for approval |
| Contactless tap | Tap card or phone on the reader | Speed at peak; tickets under the contactless limit | Explain the limit; some customers expect a signature above it |
| Mobile wallet | Apple Pay, Google Pay or similar over contactless | Fast, modern, phone-native customers | Same approval rules as a physical card |
| QR payment | Customer scans your code, or you scan theirs | Markets and regions where QR is the default | Confirm the payment notification before completing the sale |
| Gift card / store credit | Tendered through the POS; balance prints on the receipt | Returns, promotions, loyalty | Print the remaining balance; a lost balance is a service complaint |
| Split tender | Take first tender, then the remaining balance on the next | Group dining, mixed cash and card | Always work from the on-screen remaining balance, not mental maths |
Tipping is a payment-mode decision too. Where tips are added on the reader, the POS has to pass the tip through to the settlement and the daily close; where tips are added in cash, they sit outside the card record entirely. Decide the policy, write it down, and make sure the setting in the software matches what the staff actually do.
Two edge cases catch operators out. The first is a declined or interrupted card payment: the sale is still open, nothing has been charged, and the correct action is to retry the card or switch method, never to complete the sale and sort it out later. The second is the offline payment. When the terminal loses its connection, an integrated system may fall back to a store-and-forward mode that accepts the card and settles later, or it may refuse card payments altogether while still allowing cash. What it does is a property of your specific setup, and it should be tested — pull the network cable one afternoon and run a card sale — before you find out during a rush. Our overview of POS hardware requirements for cloud POS software covers what keeps a terminal selling through an outage.
Refunds, Voids and Corrections
Corrections are the highest-risk routine operation on any POS, because they are the obvious route to shrinkage. The defense is not mistrust; it is a clear rule about which correction to use and who may authorize it.
Void versus refund versus correction
- Void (before payment). The sale has not been paid. Void the line or the whole ticket, and the total simply recalculates. Use this whenever the mistake is caught before the customer pays.
- Refund (after payment). The sale was paid and must be reversed. Where possible, look the transaction up by receipt number or scan the original receipt rather than starting a new negative sale — a refund linked to the original transaction is traceable and reconciles cleanly.
- Correction (wrong item, same value). The customer paid the right amount but for the wrong item. Correcting the line, rather than refunding and re-selling, keeps the inventory and category reporting accurate.
Who can authorize a correction
As a default, cashiers should be able to void an unpaid line and call a supervisor for anything after payment. Require a manager PIN for refunds, for any discount above a set threshold, and for opening the drawer with no sale. These controls only work if the POS is configured for them, which is why the permissions step in the setup section matters.
How corrections show up in the reports
Every void and refund is written to the transaction log with the operator, time and reason code. That is not surveillance for its own sake: a sudden cluster of no-sale drawer opens or refunds at the same till is the earliest signal of a process problem, and it is invisible if the corrections were handled outside the system.
| Situation | Correct action | Approval | Effect on the day’s report |
|---|---|---|---|
| Wrong item added, not yet paid | Void the line | Cashier | Total recalculates; void logged against the cashier |
| Customer changes mind, not yet paid | Void the whole ticket | Cashier | No sale recorded; void count rises |
| Item wrong but same value, paid | Correct the line | Supervisor | Sale total unchanged; inventory and category corrected |
| Customer returns goods | Refund against original transaction | Supervisor | Negative line and refund total; inventory returned |
| Cashier rings wrong price, paid | Refund and re-ring, or partial refund | Supervisor | Both transactions visible; net matches what the customer paid |
| Drawer opened with no sale | No-sale entry with a reason code | Supervisor | No-sale count recorded — the key shrinkage metric |
Stock Counts and End-of-Day Reports
The reason a POS beats a cash register is not that it takes payments faster. It is that every sale writes to a record, so inventory and reporting become a by-product of trading rather than a separate chore. Using that record properly is the last core skill.
Receiving stock and adjustments
When deliveries arrive, receive them against the purchase order so the system knows what came in. Stock adjustments — breakages, wastage, staff meals, samples — should be entered as adjustments with a reason, not quietly ignored, otherwise the count never balances and staff stop trusting the numbers. A POS that tracks inventory but is never corrected is worse than one that does not track at all, because it produces confident figures that are wrong.
Cycle counts and full counts
A full stock count is expensive, so most operators count a rotation of categories each week rather than everything at once. The POS should let you count by category, record the variance, and post the adjustment. High-value and fast-moving lines belong in the rotation most often, because that is where shrinkage and out-of-stocks hide.
Closing the day
- Close all open tickets and confirm no sale is left pending.
- Run the Z-report or end-of-day report — this totals sales, tax, discounts, voids and payments by method, and usually resets the day counter.
- Do a blind cash count: count the drawer without being told what it should hold, then compare. A blind count is the only way to test the process rather than the person.
- Record the variance, drop cash to the safe, and log the shift as closed.
- Log out every operator so the next shift starts on a clean login.
Exporting reports
Daily sales, tax, payment-method breakdowns, product performance and staff performance should all be exportable to CSV or a spreadsheet. Export the day’s report to your accounting or bookkeeping routine rather than retyping figures — retyping is where taxable totals drift. For chains, confirm the system can aggregate multiple sites into one report without manual merging.
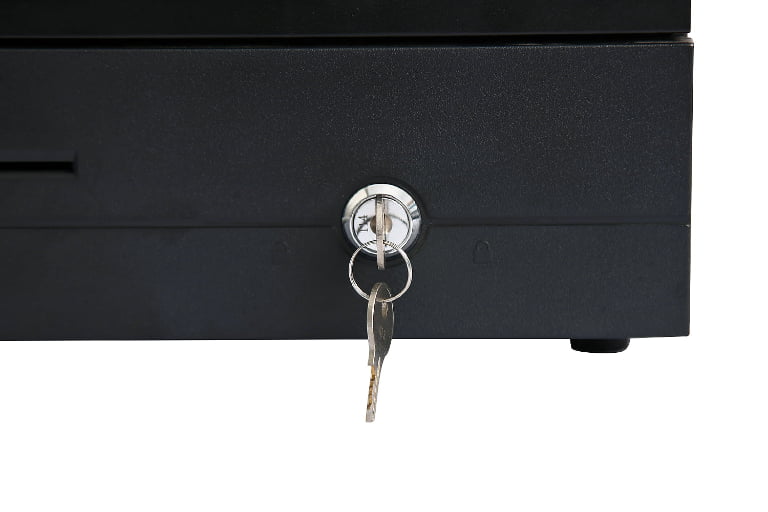
For cash-handling businesses there is one more habit worth building into the routine: the cash drawer itself. A single drawer shared across a whole day of operators cannot be reconciled to any one person, so wherever volume allows, assign a drawer per shift or per operator, count it in and out, and keep the count sheet with the report. The process above is what makes the drawer auditable, whatever hardware it sits in.
| Report | What it shows | Who uses it | How often |
|---|---|---|---|
| Z-report / end of day | Sales, tax, discounts, voids and payments by method for one day or shift | Cashier and manager at close | Every close |
| X-report / mid-shift | Same totals without resetting the day | Manager on a shift change | As needed |
| Sales by product / category | What sold, in what quantity, at what margin | Owner and buyer | Weekly |
| Payment-method breakdown | How much came in as cash, card, mobile, gift card | Owner and bookkeeper | Daily or weekly |
| Inventory / stock variance | Counted versus expected stock, and the variance | Owner and stock controller | Per count cycle |
| Staff performance | Sales, voids, discounts and no-sale opens per operator | Manager | Weekly |
| Tax summary | Taxable sales and tax collected by rate | Accountant | Monthly |
Restaurant POS: Table Management and the Kitchen Screen
Restaurant use adds a layer the retail workflow does not have: an order that stays open for the length of a meal, moves between tables, is fired to the kitchen in courses, and is paid at the end. The controls are different, but the underlying rule is the same — every action should be on the record.
Opening and moving tables
A table-service POS shows a floor plan. Opening a table starts a ticket attached to that table; moving a party re-assigns the ticket; merging two tables combines them into one bill. Get the floor plan right during setup — a plan that does not match the room forces staff to build workarounds that defeat the system.
Coursing and firing
Items are entered as they are ordered but sent to the kitchen when the course is fired. The POS holds the appetisers and mains separately, fires the mains when the kitchen is ready, and timestamps each fire. This is what makes course timing controllable instead of hopeful, and it is the point at which the POS and the kitchen display have to agree on what was sent.
Sending the order to the kitchen
A fired order goes either to a kitchen printer or to a kitchen display system (KDS). This is where the POS software meets the hardware it drives, and where a misconfigured station map shows up as food going to the wrong station. From the operator’s side, the workflow is simple: fire the course, watch for the acknowledgment, and never assume a ticket transmitted just because the button responded. If your operation is moving away from paper, the KDS guide explains the routing and hardware decisions in detail.
| Service style | Order taken | Held open? | Sent to kitchen | Paid |
|---|---|---|---|---|
| Counter service / QSR | At the till or tablet | No — paid up front | Immediately on payment | Before the food is made |
| Fast casual | At the till | No — paid up front | Immediately on payment | Before the food is made |
| Table service (full service) | Handheld or fixed POS on the floor | Yes — for the whole meal | In courses, when fired | At the end, possibly split |
| Bar service | At the bar POS | Usually yes — running tab | Drinks direct, food to the kitchen | When the tab is closed |
| Tablet / handheld tableside | At the table | Yes | Wireless to kitchen or KDS | At the table if the terminal takes cards |
Splitting the bill and adding gratuity
Splitting by item, by seat or evenly are all normal POS functions, and large parties often need an automatic gratuity added above a threshold. Confirm the gratuity rule is configured so it appears consistently, and that the POS records the tip against the right settlement so the end-of-day reconciliation still balances.
Handheld and tablet terminals have changed restaurant POS use more than any single screen feature. A server can take the order at the table, fire it to the kitchen without walking back to a fixed till, and in many setups take the card payment tableside as well. The operating rules do not change, but two do: the handheld has to stay connected for orders to reach the kitchen, and it needs to survive a whole shift on one charge. Test the battery life against your busiest service before a rollout, and have a charging routine rather than discovering the limit at 8 pm. For the floor-side hardware choices that pair with the software, see our restaurant till setup.
Training Staff to Use the POS
A POS system is only switched on and left to run by a team that has been trained on it. This is the part of a rollout most operators rush, and it is the single biggest cause of the refunds, voids and mis-counts that damage margins in the first month. Training is not a one-hour session on the day the system arrives; it is a short, structured ramp with a check on what people can actually do.
Train by role, not everyone on everything
- Cashiers and servers: log in, open a sale, add and edit items, take cash, card, mobile and split payment, issue a receipt, park and recall a ticket.
- Shift supervisors: everything a cashier does, plus approval-level actions — refunds, larger discounts, no-sale drawer opens, voiding a completed sale.
- Managers and owners: everything above, plus setup — products and menus, permissions, tax rates, printer and payment settings, and the reporting and export routine.
A five-day ramp
| Day | Focus | Who | Pass criteria |
|---|---|---|---|
| Day 1 | Log in, open a shift, ring a simple sale, take one card payment | All frontline staff | Completes a sale unaided three times |
| Day 2 | Edit a ticket, apply a discount, take cash and calculate change correctly | Cashiers and servers | Correct change on five cash sales running |
| Day 3 | Split payment, split a bill, park and recall, send an order to the kitchen | Servers and supervisors | Handles an eight-item ticket with a split tender |
| Day 4 | Refunds, voids and corrections under supervision | Supervisors (and staff shadowing) | Corrects a paid sale with the right action, logged |
| Day 5 | End-of-day: close tickets, run the Z-report, blind count, export | Supervisors and managers | Reconciles the drawer within tolerance unsupervised |
Practice mode and cheat sheets
Most POS systems have a training or practice mode that lets staff ring dummy sales without touching the live data. Use it. Then put a laminated one-page cheat sheet beside the till with the six most common actions and screenshots — new staff go blank under a queue, and a cheat sheet beats a help-desk call. Keep one "super user" per shift for the first few weeks, and hold a short review after week one to collect the real-world snags.
Measure the ramp, do not just run it
Use the POS data to check the training worked: look at voids, discounts and no-sale opens for the first month. If they are falling week on week, the team is learning. If they are not, the gap is usually a specific workflow that was never demonstrated rather than a person who does not care — and the fix is targeted retraining on that one action.
Because hospitality and retail staff turn over constantly, the training plan has to be repeatable rather than a one-off event. Keep the cheat sheet, the practice-mode walk-through and the five-day ramp as standing documents so a new starter on their first Monday is following the same path as everyone before them. For multi-site operators, standardize the permissions and the close-of-day routine across locations as well as the software settings, so a manager moving between sites is not relearning the process at each one. The goal is a workflow a new hire can be walked through in an afternoon and a supervisor can audit in five minutes, on any lane, in any store.
Common POS Operating Mistakes
Almost every expensive POS problem is an operating problem, not a hardware failure. These are the ones that show up again and again, in independent shops and in chains.
| Mistake | What it looks like | The fix |
|---|---|---|
| Shared logins | One PIN or account used by the whole team | One login per person; individual logins make every action traceable |
| No opening float | The drawer is simply topped up when it runs low | Count and record the float at the start of every shift |
| Voiding instead of refunding | Paid sales canceled with a void to "fix" them | Refund against the original transaction; a void on a paid sale hides the record |
| Keying the amount on the card reader | The total is typed on the terminal, not sent from the POS | Use the integrated flow; a hand-keyed amount is how totals mismatch at settlement |
| Working out splits mentally | The cashier calculates the remaining balance in their head | Always split against the on-screen remaining balance |
| Skipping the blind count | The drawer is reconciled by telling staff what it should hold | Count blind, then compare; only a blind count tests the process |
| Never adjusting inventory | Stock is tracked but breakages and wastage are ignored | Enter adjustments with a reason; untrusted numbers get ignored |
| No price-override control | Any cashier can change a price silently | Require approval and make overrides reportable |
| Training on opening day | Staff meet the system during a live peak | Train on a ramp before go-live, in practice mode, by role |
Frequently Asked Questions
How do I use a POS system step by step?
Log in with your own credentials and open a shift with a counted cash float. Open a sale and choose the order type, then add items by scanning, tapping a tile, searching or manual entry. Adjust for modifiers or quantities, review the total, and take payment by cash, card, mobile wallet or a split tender. Issue a receipt, and at the end of the shift close the day and reconcile the drawer against the report.
What is the difference between using a POS system and a cash register?
A cash register totals a sale and opens a drawer. A modern POS system records the whole transaction as structured data — items, staff member, payment method, time and the resulting inventory movement — so it also drives inventory, reporting and staff accountability. That is why learning a POS is mostly a software skill, while learning a traditional cash register is mostly a keypad skill.
How long does it take a new employee to learn a POS system?
Most frontline staff become productive in a single shift for basic sales, and confident with edits, splits and multiple payment methods within two to three shifts. Supervisors usually need about a week to handle refunds, approvals and the end-of-day close unaided. A structured five-day ramp by role, with pass criteria, is a realistic target for a full team.
Can I practice on a POS system before going live?
Yes. Most POS platforms include a training or practice mode that lets staff ring dummy sales without affecting live data or inventory. Use it before go-live, keep a laminated cheat sheet of the six most common actions at the till, and keep one super user on every shift during the first few weeks.
Who should be allowed to issue a refund on a POS?
By default, only supervisors or managers. Cashiers should be able to void an unpaid line, but anything after payment — refunds, corrections and larger discounts — should require a manager PIN. Configure these permissions in the POS, because a rule that is not enforced in software is not a rule.
How do I handle split payments on a POS?
Record the first tender, then let the POS display the remaining balance and take the second tender against that balance rather than the original total. The same applies to splitting a bill by item, by seat or evenly. Always work from the on-screen remaining balance; never calculate the split in your head.
What should I check before opening the store each day?
Confirm the receipt printer has paper and is online, the card reader is paired and connected, the product or menu file has synced, and the opening cash float is counted and recorded. Log in with your own credentials. These four checks take two minutes and prevent most of the disruptions that happen mid-queue.
How do I close out a POS at the end of the day?
Close all open tickets, run the Z-report or end-of-day report, do a blind cash count and record the variance, drop cash to the safe, and log out every operator. Then export the day’s report to your bookkeeping routine rather than re-typing any figures.
Why does my POS say offline, and can I still sell?
An offline message usually means the terminal has lost its internet or network connection. Many modern POS systems have an offline mode that continues to take sales and stores them locally until the connection returns, but behavior varies by platform and offline card payments are often limited. Confirm your system’s offline behavior before you rely on it, and keep a documented fallback.
How much POS training should I budget for a new location?
Plan for a five-day ramp before go-live, one super user per shift for the first month, and a short review after week one. The cost is mostly staff time rather than money. It is consistently cheaper than the refunds, voids and stock errors that an untrained team produces in the first month of a new system.